Gitlab CI for Pelican
Kyle Martineau-McFarlane
15 September 2021
Note, 2021-09-15: I no longer use WebFaction or Gitlab for this website, but this may be of interest to someone. Perhaps even me, one day.
This website uses a static site generator called Pelican. This allows me to write pages and blog posts in the plain-text-style reStructuredText format, and to have it automatically turned into static HTML pages which can be uploaded to a plain web server without the need for a backend or a database. To make this process automatic, I use the GitLab CI/CD (continuous integration/deployment) feature to build and deploy the site to my web server. This blog post outlines the process required to set up a Pelican blog to deploy via rsync over SSH using the GitLab CI/CD pipeline.
To follow along, go to the Pelican website and follow the instructions to install Python and create a new project. You'll also need the git client, a GitLab account and a GitLab project containing your Pelican project.
The plan
Once you have your Pelican website set up and configured the way you want it, there are three steps to get the GitLab CI/CD process working:
- Setting up your web server to allow SSH access
- Adding the SSH connection details for your web server into GitLab
- Defining your build pipeline
Setting up your web server
If you are running your own web server, you'll want to install nginx or something similar. My website runs on WebFaction, where I have a static app installed and configured to host files from ~/webapps/main_website at https://kyle.martineau-mcfarlane.com.
To allow secure rsync, we need a private/public keypair with the private key stored securely in GitLab and the public key on the web server. To do this:
- On my local PC, run ssh-keygen (in Git Bash if on Windows). Don't set a passphrase. Save the files to a temporary location.
- Copy the contents of id_rsa.pub to ~/.ssh/authorized_keys on my web server.
While on the web server, run ssh-keyscankyle.martineau-mcfarlane.com and make a note of the output; this reveals the public SSH host keys of the server; we'll use these later to ensure GitLab is communicating with our server and not an imposter.
To test that the connection works, from my local PC, I run:
# ssh -i id_rsa myuser@kyle.martineau-mcfarlane.com
This should connect successfully without prompting for a password.
GitLab configuration
We now need to store this information securely in GitLab. Unlike the pipeline configuration, we're not going to check in the private key; this is far too sensitive to trust to version control and should not ever be done.
Fortunately, GitLab has a setting for variables like passwords and private keys.
Within my GitLab project, go to "Settings" > "CI / CD", and expanded the "Variables" section. I added in the following:
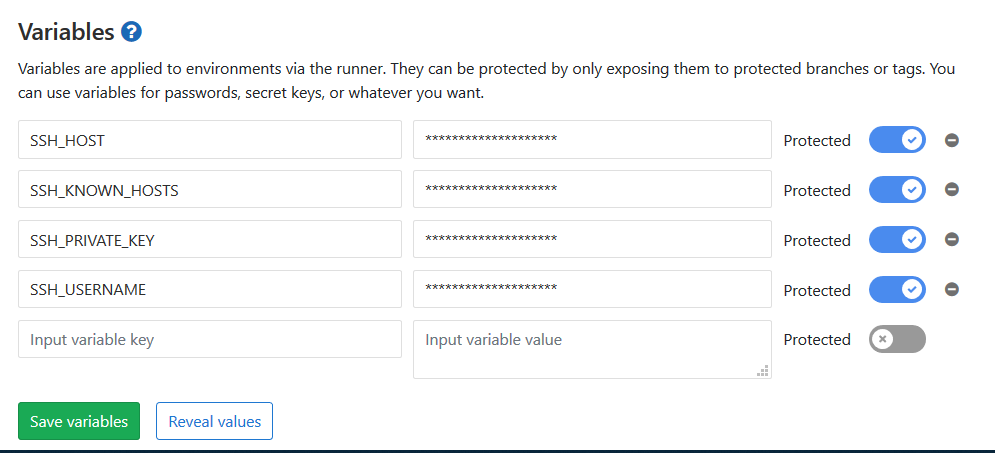
- SSH_USERNAME: The username I use for SSH
- SSH_HOST: The hostname to which I SSH
- SSH_PRIVATE_KEY: The contents of id_rsa from the previous step
- SSH_KNOWN_HOSTS: The output of ssh-keyscan, above
By storing this sensitive information within GitLab's settings, we ensure that - even if someone gets access to the code - the secure information remains secure.
.gitlab-ci.yml
Now that our web server is correctly configured and our secure data is stored in the GitLab settings, we need to define our CI/CD pipeline. As this is just a one-person blog, we'll have a simple, two-job pipeline which builds and deploys. We will build on all branches to verify that the Pelican configuration is correct, but will only deploy when we have merged into master.
My file (slightly obfuscated and commented) is:
# default to using the latest Python docker image for builds
image: python:3.7.0

# our build job installs the Python requirements and Pelican
# plugins, then runs ``make publish`` to generate the output
build:
  stage: build
  script:
  - apt-get update -qq && apt-get install -y -qq python python-pip
  - python -v
  - pip install  -r requirements.txt
  - git clone --recursive https://github.com/getpelican/pelican-plugins ../pelican-plugins
  - make publish
# specify the artifacts to save
artifacts:
  paths:
    - output/

# our deploy job installs rsync, then makes use of our secret
# settings to configure SSH and deploy
deploy:
  stage: deploy
  only:
  - master
  dependencies:
  - build
  script:
  - apt-get update -qq && apt-get install -y -qq rsync
  - 'which ssh-agent || ( apt-get update -y && apt-get install openssh-client -y )'
  - eval $(ssh-agent -s)
  # set ssh private key
  - echo "$SSH_PRIVATE_KEY" | tr -d '\r' | ssh-add - > /dev/null
  - mkdir -p ~/.ssh
  - chmod 700 ~/.ssh
  # set known hosts
  - echo "$SSH_KNOWN_HOSTS" > ~/.ssh/known_hosts
  - chmod 644 ~/.ssh/known_hosts
  - rsync -avzh --delete output/* $SSH_USERNAME@$SSH_HOST:/home/myaccount/webapps/main_website/
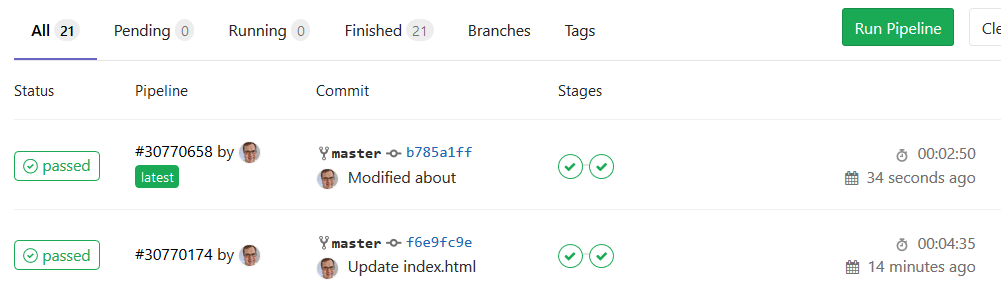
This configures a pipeline with two stages which will build and deploy the website:
Conclusion
With a very few simple steps, we're leveraging the power of a CI/CD pipeline to fully manage my website. All content and posts are handled through plain text, and on a successful commit, are built and deployed to the web server automatically.